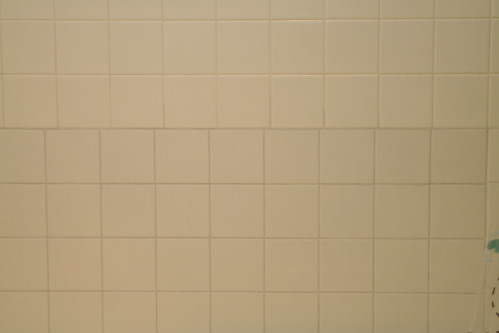
It has been said that you don’t truly own your own home until you’ve started a 30 minute, $20 project that turns out to cost more than your down payment and last for weeks. If it hasn’t been said before, well I’m saying it now. We recently started such a project in Wesley’s bathroom. I had notice 4 loose tiles. They were down in the corner and looked a little off. They weren’t falling off or anything, they just looked like they needed a little attention. The plan was to carefully remove the tiles add some fresh mortar, grout, caulk and ignore forever. The project went according to plan right through step one.
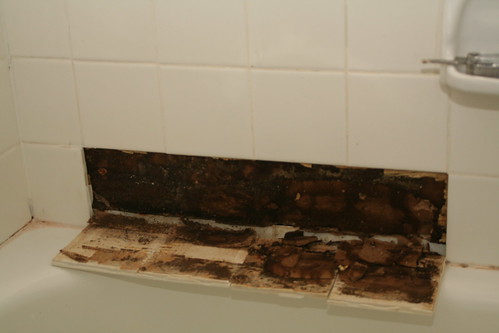
The tiles came right off. And then I saw the water damage. So off with more tiles and more tiles and more tiles. I had to keep removing tiles until I got well past any wet areas. So 44 tiles later we have a good size mess. Typically tiles are attached to the wall by way of mortar. The wall itself is made of concrete board that resists water and has sufficient texture to hold the mortar. Not our intrepid builder. Back in 1986 our builder decided that drywall technology had reached its apex and could now be used in bath surrounds. Apparently he (I’m assuming the builder is a he. Totally sexist assumption I have nothing to back this up)thought that drywall meant that it would keep the wall dry. Wrong. He also decided to skip mortar and go with glue. Needless to say it wasn’t exactly a textbook installation and removing the tiles was quite a mess.
As the tiles came off I also removed the drywall. Behind the drywall was a vapor barrier. Oh wait. No, there wasn’t a vapor barrier. Again I can only assume the builder was convinced that his drywall was superior and needed no assistance. So instead of a vapor barrier we had wet insulation and an ant colony. Yay! Ants! As I opened up the wall the ants began to flow out of the wall onto the remaining tile and into the tub. I immediately got the out of the tub. So far the ants we’ve met in Texas (and there have been many) haven’t been exactly friendly. Basically they bite and bite and bite and then you get little pustules that itch for weeks. I immediately got on the phone with Amber who was out and about and said “bring me home something to kill ants I don’t think the organic orange stuff is going to do it”. I did spray the ants with our orange oil spray which helped keep them in the wall, but didn’t exactly make them dead which was what I was looking for. I locked the bathroom door and waited for Amber to come home.
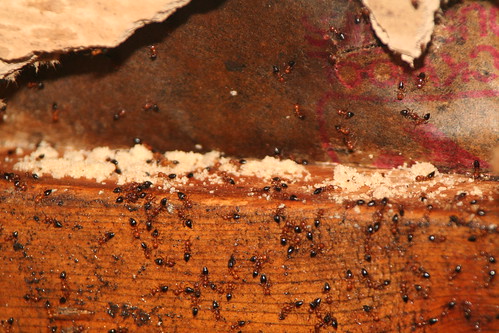
It turns out the ants aren’t really that bad. They aren’t fire ants fortunately or I’d probably have given up and had someone else do the work. They were pretty docile and I haven’t been bit yet (I’m crossing my fingers for luck, but it makes typing hard). But there were a lot of them and they need to not be in the wall or streaming out of the wall crawling all over me and the house. So they had to go. Sorry little guys.
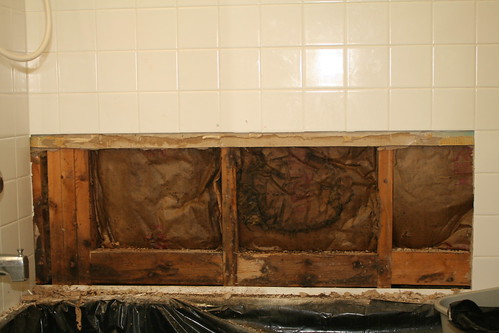
Once the ants were out of the way I ripped out the wet insulation and let everything dry. Fortunately, while things were damp to an ants liking, the wood was all fine. I let everything sit open for a while to dry out. Then I installed new insulation and backerboard (cement this time) and started to look at tiles. The idea here was to repair it in such a way that you’d never know that it had been repaired. I took one look at our 4″x4″ white tile and thought “Ah, perfect generic tile, that will be easy to replace.” It turns out I was wrong. You see, like American’s in general tile has been getting, shall we say, pleasantly plump over the years. So a 4″x4″ tile from 1986 is smaller than the same size tile today. I bought tiles at Home Depot and at Lowe’s. Both were supposed to be the same size, but turned out to be about 1/16th of an inch larger than tiles already on my wall.
So I dug through the garbage pile containing the dead ants and tiles and found that my tiles were made by Dal-Tile. I called around a bit and found myself at the Dal-Tile showroom in Austin. A nice guy who knew the model number of the tile brought some out. I expressed my concern and he gave me some to take home as a trial at no cost. Sadly, Dal-Tile has been hitting the potato chips too and these tiles will also not fit into their clothes from high school anymore. I briefly had ideas of trimming the tiles with the tile cutter I bought or somehow using a grinder to make the tiles smaller, but decided that the results would not be pretty.
So that left us with two options. The first was to spend even more money and redo the entire thing. The problem with that was mostly that we had no design ideas. We could replace it all with new white tile, but while I actually like the way it looks it just galled me too much. It felt stupid to spend a whole bunch of money just to have exactly what we had before (minus the water damage). The other option was to repair it. Make it look as good as possible and then replace it all later with something that looks better. This option had the benefit of getting it done before guests arrived in February and getting Wesley back in his tub (and out of ours) as soon as possible.
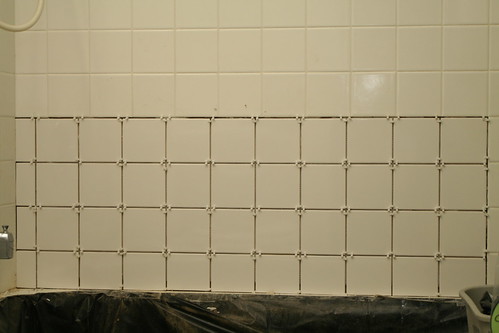
I’d never done any tiling before so this was good practice. I used a premixed mortar/grout stuff. I wouldn’t recommend it. It didn’t work great as grout or mortar, but for this application it doesn’t really matter since we’ll be ripping the whole nonsense out anyway. Standing in line at Home Depot the checker darn near lost an arm picking up the box of tiles. He tried to pick it up and seemed very surprised, gave me a goofy smile and said “wow those are heavy”. Just as we were agreeing that everything tile related is heavy (grout, tiles, cement board) a man came up behind in line that asked me how much I’d spent so far. I told him about $200. He said, “well you never get a tiling project done for less than $500.” We all laughed. Turned out he was right. By the time we redo the bath I’ll be well over $500.

Tags: home renovation, remodel, tile, tiling
Nice. I didn’t know there was such a thing as a 30 minute, $20 repair job. I replaced the trim on the door once and it took me 9 hours and $250 (needed that compound miter saw to cut the end off.)
I like that you locked the door so the ants couldn’t get out. Good thinking.
Great post, really funny! You rock, my friend.
D